Call tracking webhooks are automated messages sent from the Infinity Platform when something happens. They let you receive a notification that a call event has taken place, which can then trigger a workflow or follow-up action in your own platform. This guide explains the three triggers, how to set up a webhook, and how to edit, pause or delete one.
What are call tracking webhooks?
Rather than polling our API to establish whether an event has occurred, you can configure webhooks to be notified when it has happened. Webhooks are extremely versatile and can be configured quickly and easily in the Infinity Platform.
Add call tracking webhooks
Configuring call tracking webhooks in the Infinity Platform is quick and easy. There are three triggers you can use to start each webhook:
- The start of a call: trigger an alert to inform you that a call has begun.
- The end of a call: trigger an alert to inform you that a call has ended.
- The end of a call which has then been processed in Infinity: trigger an alert to inform you that a call has ended and been fully processed by Infinity.
Important: If your webhook trigger is anything other than post call, you will need to raise a ticket with the Infinity Support Team so that they can update your realtime data settings to allow the data to flow successfully.
Open the Webhooks page
Log in to the Infinity Platform and select Settings from the bottom of the left-hand navigation. Then choose Webhooks from the Integrations section.
If you don't have any webhooks configured, you will see this screen. Click the green button to begin creating your webhook.
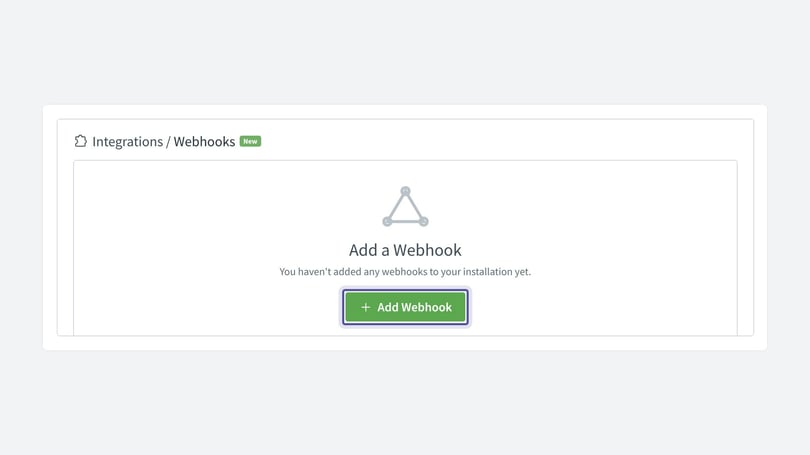
You will see the webhook configuration screen, which has two sections: Basics and Webhook details. Let's start with the Basics.
Basics
Give your webhook a name, choosing something that will help you identify it easily.
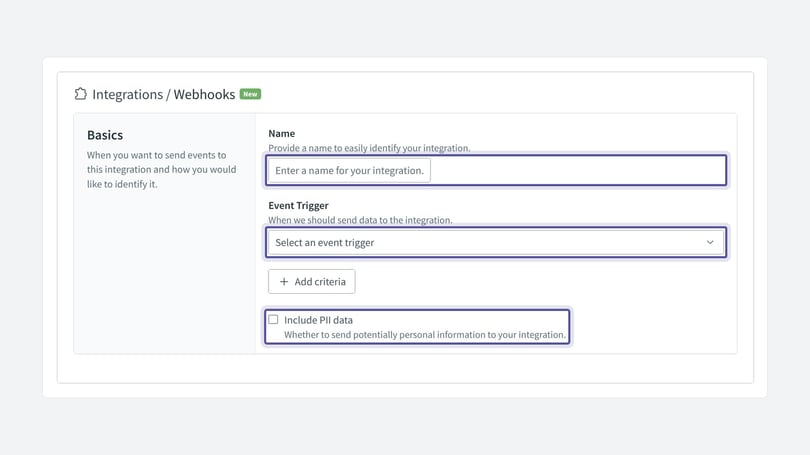
Next, choose the Event Trigger: when a call starts, when a call ends, or when a finished call has been processed. Make your selection, then move to the criteria builder to add fields that refine the conditions for sending a webhook.
The criteria builder lets you define the criteria that will trigger a webhook message. The dropdown includes a search to help you locate a field. You can then add an operand and a value. In the example below, the criteria trigger a message on the start of a call when the Tracking Pool is Australia.
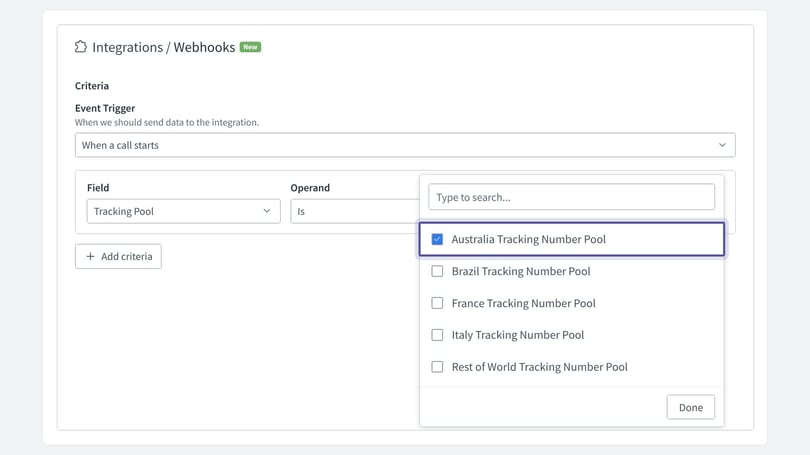
You can add more criteria as needed to control the trigger for your webhook.
Finally, you can include PII data within the message. By default, sensitive data such as caller IDs is redacted. To send the data unredacted, tick Include PII data. You will need permission to view PII data yourself to make this change.
You can then move on to the Webhook details section.
Webhook details
In this final section, provide an endpoint and configure the payload, which is the set of fields you want to include in your webhook. Start by adding a URL endpoint that the message will be sent to. Then move to the parameters section to build out the message content.
Use the dropdown and search to locate each field you want to include in your message. Add the field, then use the parameter name to give it a name. You can see a preview of the message at the bottom of the page.
Some fields have the option of both IDs and names. Other fields, such as Total Keyword Score, are only populated if you use Conversation Analytics on that tracking pool.
Custom variables and passthrough tags
If you capture custom variables on the page, you can include them in your webhook. Select the Custom Tags field.
To include the content of any passthrough tags, such as Google Click ID (GCLID) values from landing pages for callers who arrive at your website via paid search, select the Pass Tags field.
Fixed values
You can pass a fixed value through with each message. Select Fixed Value from the dropdown.
Important note
The field list in the dropdown is unified across all three triggers. Some fields are only available once a call has finished, and other fields, such as goal value, are only available once the call has finished and been processed.
When you have finished building your webhook, select Save to save your changes.
Edit call tracking webhooks
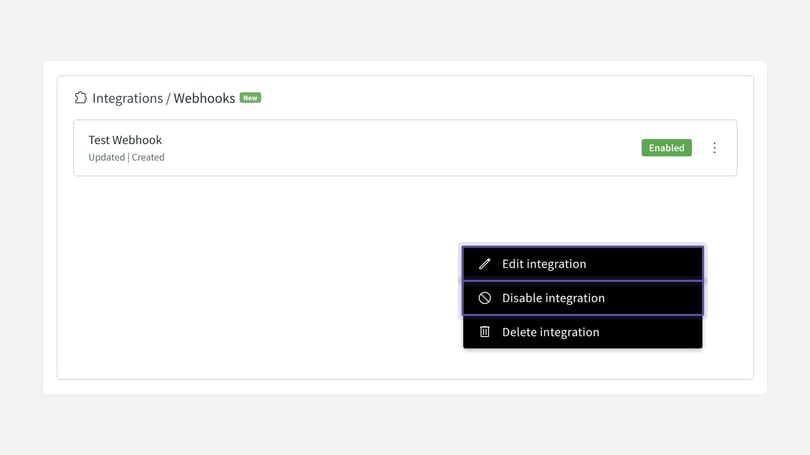
Once the webhook is saved, you will see the webhook list view, with your configured webhooks. Active webhooks are shown with the Enabled badge.
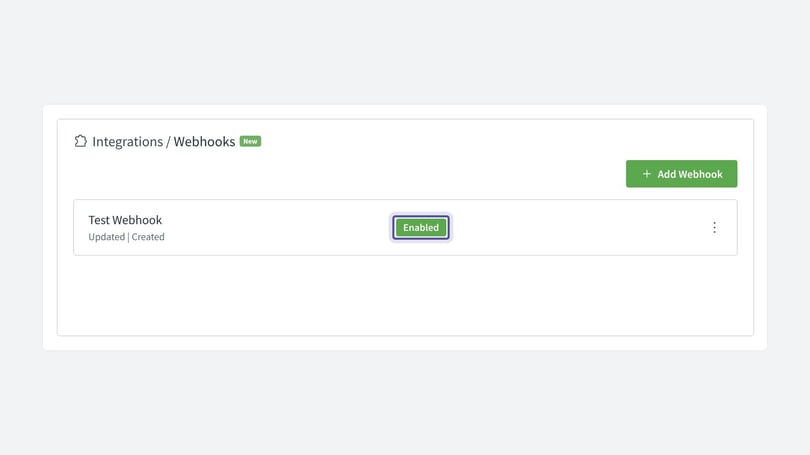
To make changes to your webhook, select the more menu (ellipsis) and select Edit integration.
Pause and delete call tracking webhooks
To pause your webhook for any reason, use the Disable integration option, as shown above. The badge on the summary screen updates to show Disabled.
To remove a webhook you no longer need, use the Delete integration option.
Need more help?
If you're still stuck, get in touch with your account team or email support@infinity.co.